Browse documentation
Go live
Your sandbox stays as it is. Going live means creating a production Entity next to it, with your real bank and your real invoices.
You can keep using the sandbox afterwards to try a new rule or a new mapping before you change production.
Choose your option
| Option | What you load on day one | Best when |
|---|---|---|
| Start fresh | Your open invoices only. Matching starts with the bank lines from today. | You want to start fast and your history does not matter for matching. |
| Migrate your history | Your open invoices, plus past invoices and bank lines, for example since the start of your fiscal year. | You want payer scores and the dashboard to be complete from day one. |
| Run in parallel | Either of the above, while your team keeps its current process for a few weeks. | You want to compare Invunion’s results with your own before you rely on it. |
The payer score uses your issued invoices of the last 12 months. With Start fresh, scores fill in as invoices get paid. See Payer scoring.
For Migrate your history, load the invoices before the bank lines, so each payment finds its invoice. Use the mappings from Technical setup.
Create your production Entity
-
Open the Entity list at the top of the menu and select New entity.
-
In Create a new entity, type the Entity Name and select Create.
-
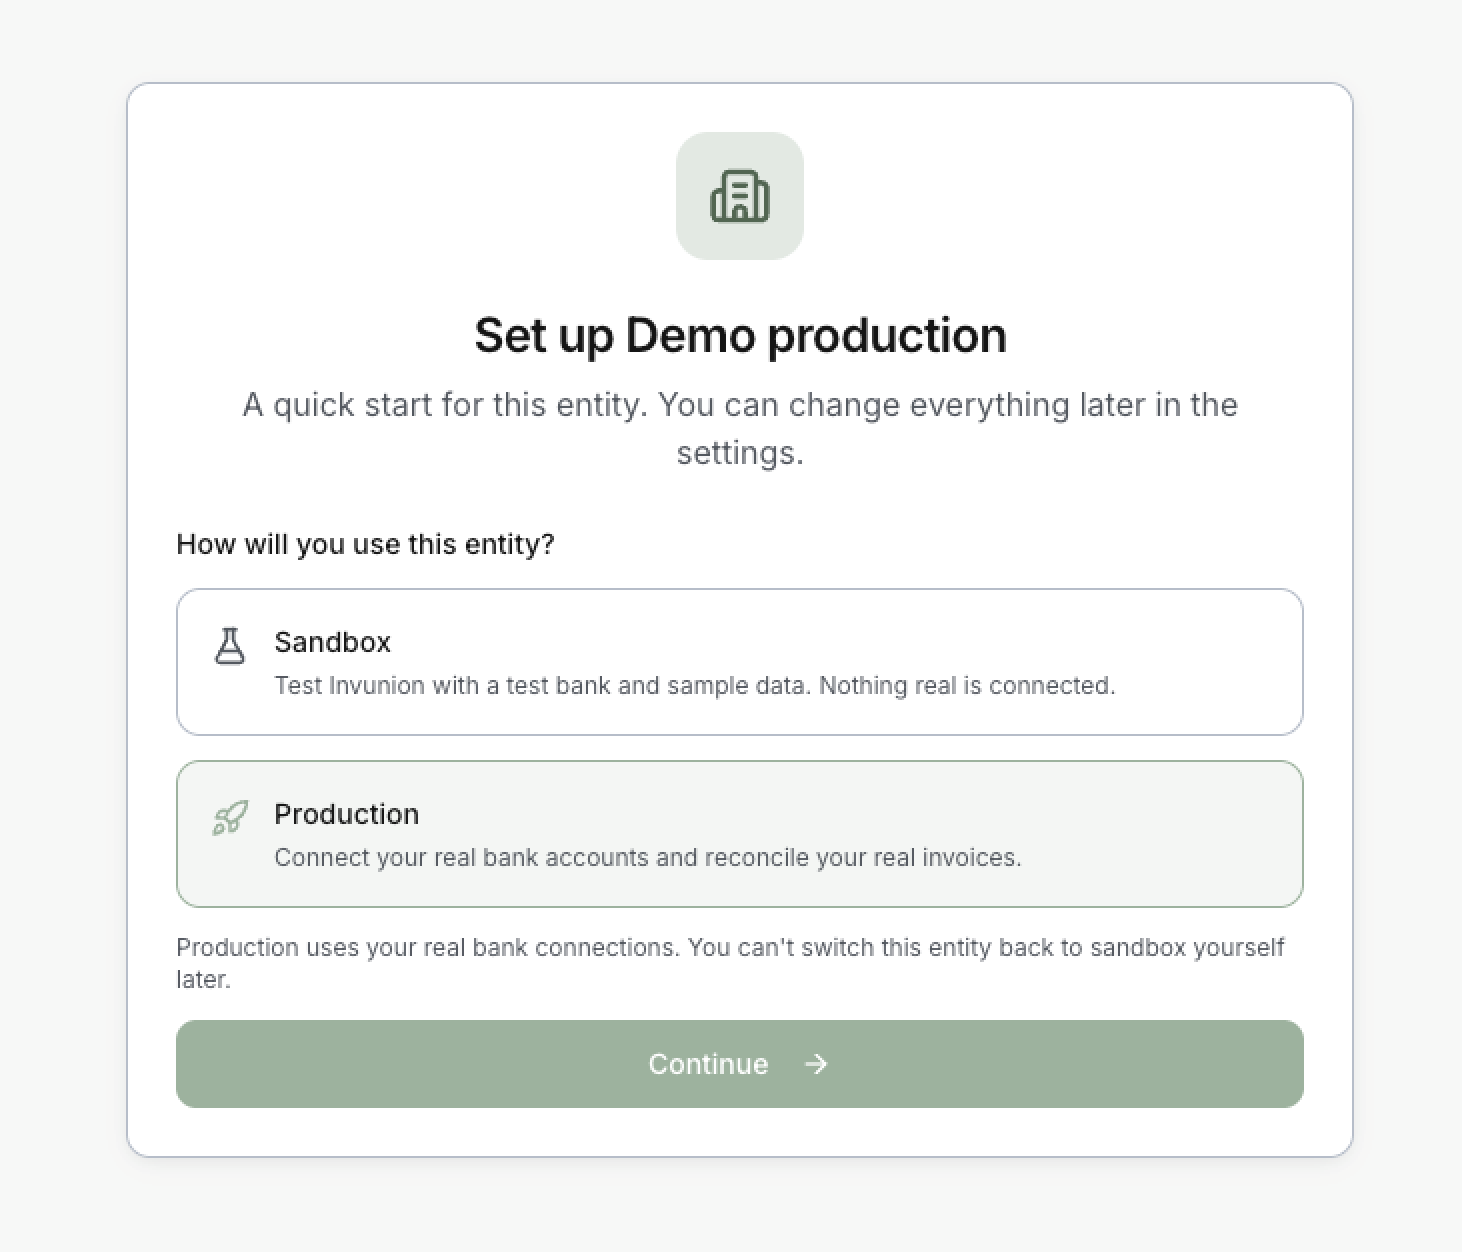
Invunion opens the setup of the new Entity. Under How will you use this entity?, choose Production.
-
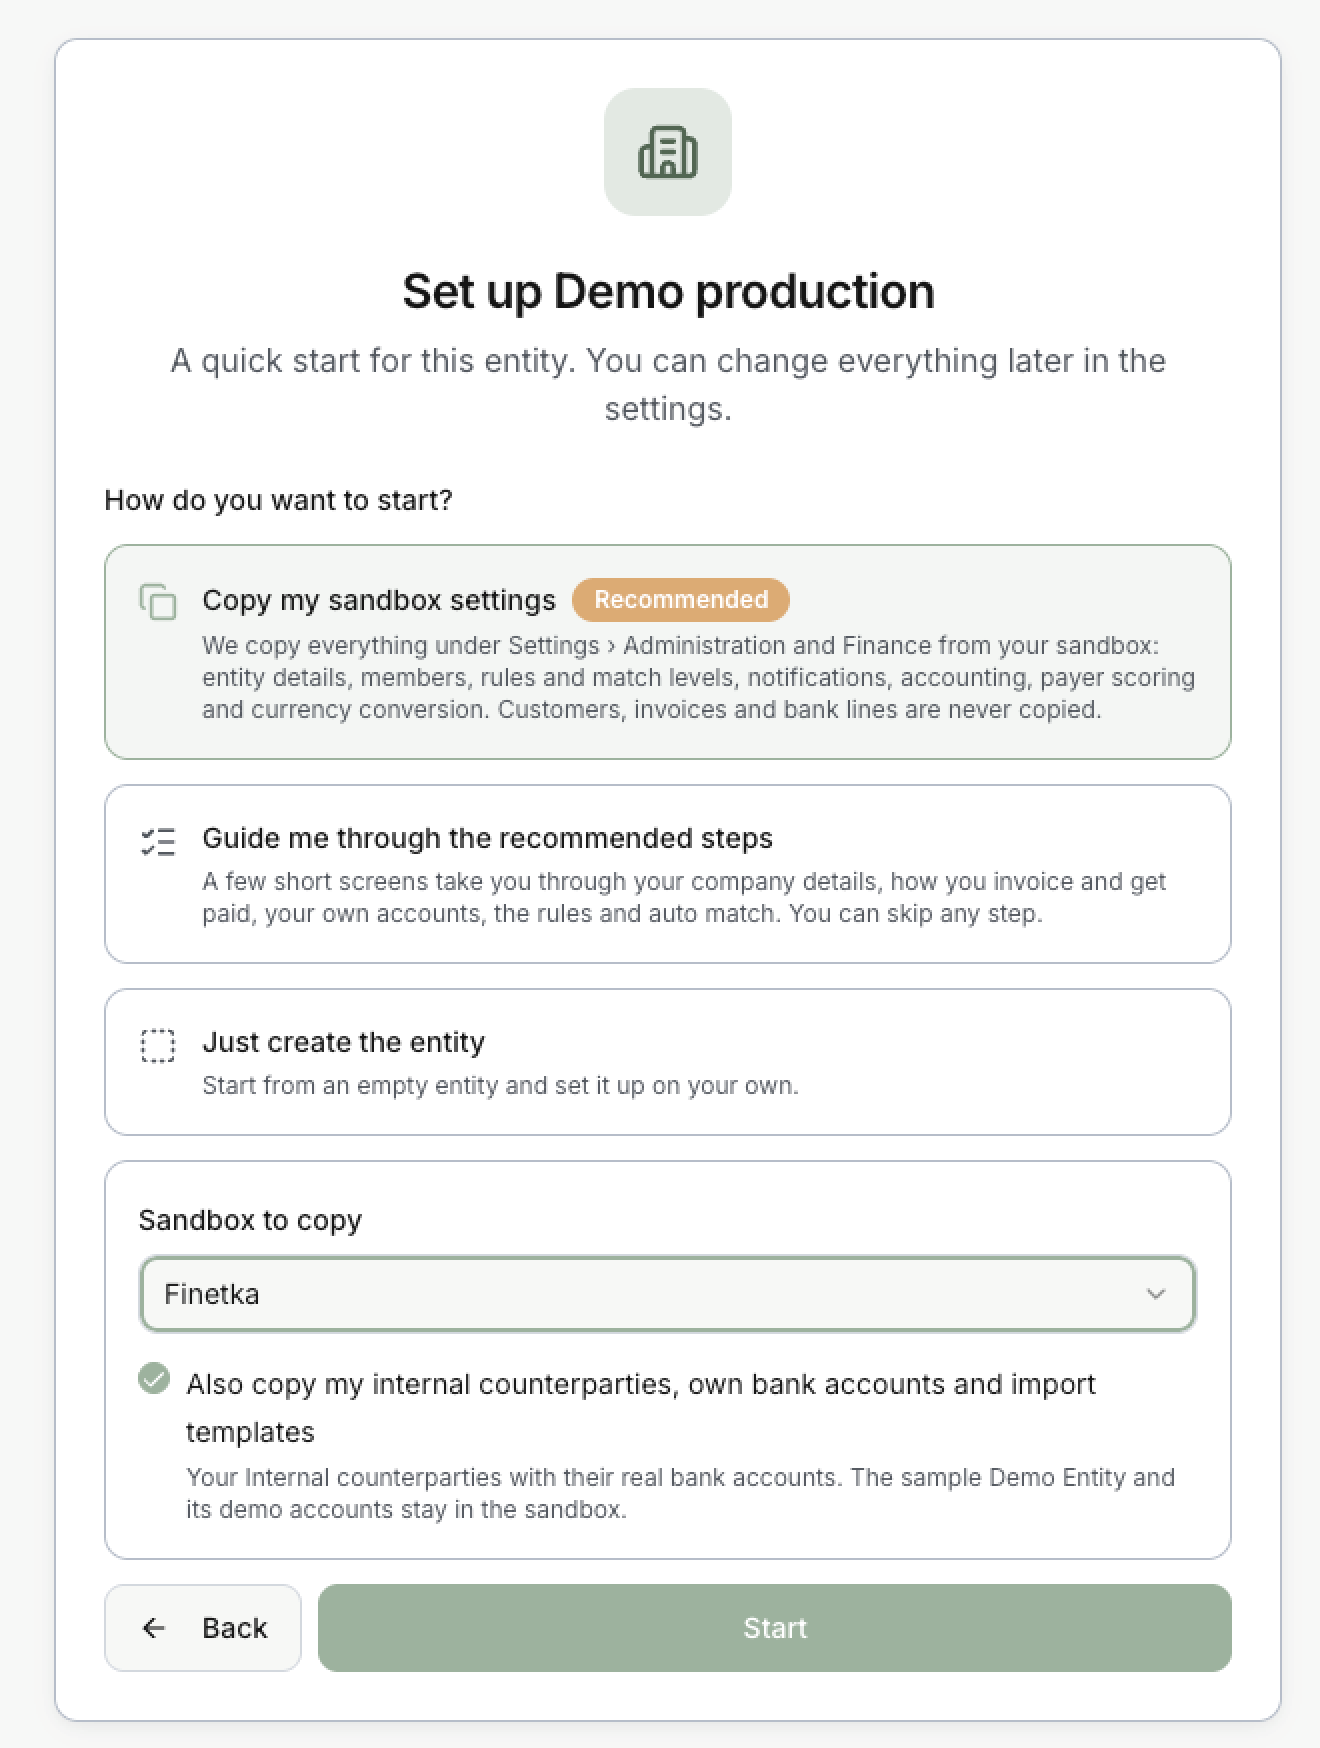
Under How do you want to start?, choose one of the options below, then select Start.
Production is offered only once you have a sandbox Entity that is set up. You cannot switch a production Entity back to sandbox yourself later.
Start empty or copy your sandbox
| Option | What you get |
|---|---|
| Copy my sandbox settings (recommended) | Everything under Settings > Administration and Finance in your sandbox: Organization & Entity details, members, rules and match levels, notifications, accounting and invoice schedules, payer scoring and currency conversion. E-invoicing rules are copied but stay off until you turn them on. |
| Guide me through the recommended steps | Short screens for Organization and entity, Your business model, Your own accounts, Rules and Auto match. You can skip any step. |
| Just create the entity | An empty Entity. You set everything up yourself in the settings. |
With Copy my sandbox settings, Also copy my internal counterparties, own bank accounts and import templates brings those too. It is ticked by default. Untick it if your sandbox uses test bank accounts. The sample bank accounts are never copied. If you have several sandboxes, choose the one to copy under Sandbox to copy.
Customers, invoices, bank lines and matches are never copied. Nor are bank connections, API keys and webhooks.
Complete your setup in production
What is left depends on your choice.
- If you copied your sandbox, check the copied settings once, for example the SFTP file prefixes in Developer > Import data. Without the checkbox, add your Internal counterparty and own accounts and map your imports again. See Import your internal information and Technical setup.
- If you followed the guided setup or started empty, do the Administration steps the setup did not cover, then map your imports again. See Administration setup and Technical setup.
- For the API, always create a new API key and add your webhook endpoints in the production Entity. A key works only for the Entity where you created it. See API keys and Webhooks.
Connect your real bank
- Open Banking: connect your bank from the dashboard. In production, Invunion uses real bank connections, not the test bank.
- SFTP: ask Invunion to set up automatic statements for the production Entity. See Automatic statements.
- EBICS: add your EBICS contract in the production Entity, send the keys and sign the initialisation letter. See EBICS.
Then load your invoices the way you chose above.
Your first days
- Open the Match inbox every day and confirm or reject what waits there.
- Look at the Unmatched bank lines and fix their cause with a rule, not one by one.
Updated · View as Markdown