Browse documentation
Connect Slack to notifications
Invunion sends its messages to a Slack channel through a Slack incoming webhook. A webhook is a private web address that belongs to one channel. Anything Invunion posts to it appears in that channel.
You do the first part in Slack, the second in Invunion. It takes about five minutes.
Before you start
- You can add apps to your Slack workspace. If you cannot, ask a Slack admin to follow the steps in Part 1 for you.
- You can edit notification rules in Invunion. See Notifications.
Part 1: create the webhook in Slack
You create a small Slack app from a ready-made block of settings. Copy the block, paste it, and do not change anything in it.
- Open api.slack.com/apps and select Create New App.

- Choose From a manifest and select Continue.
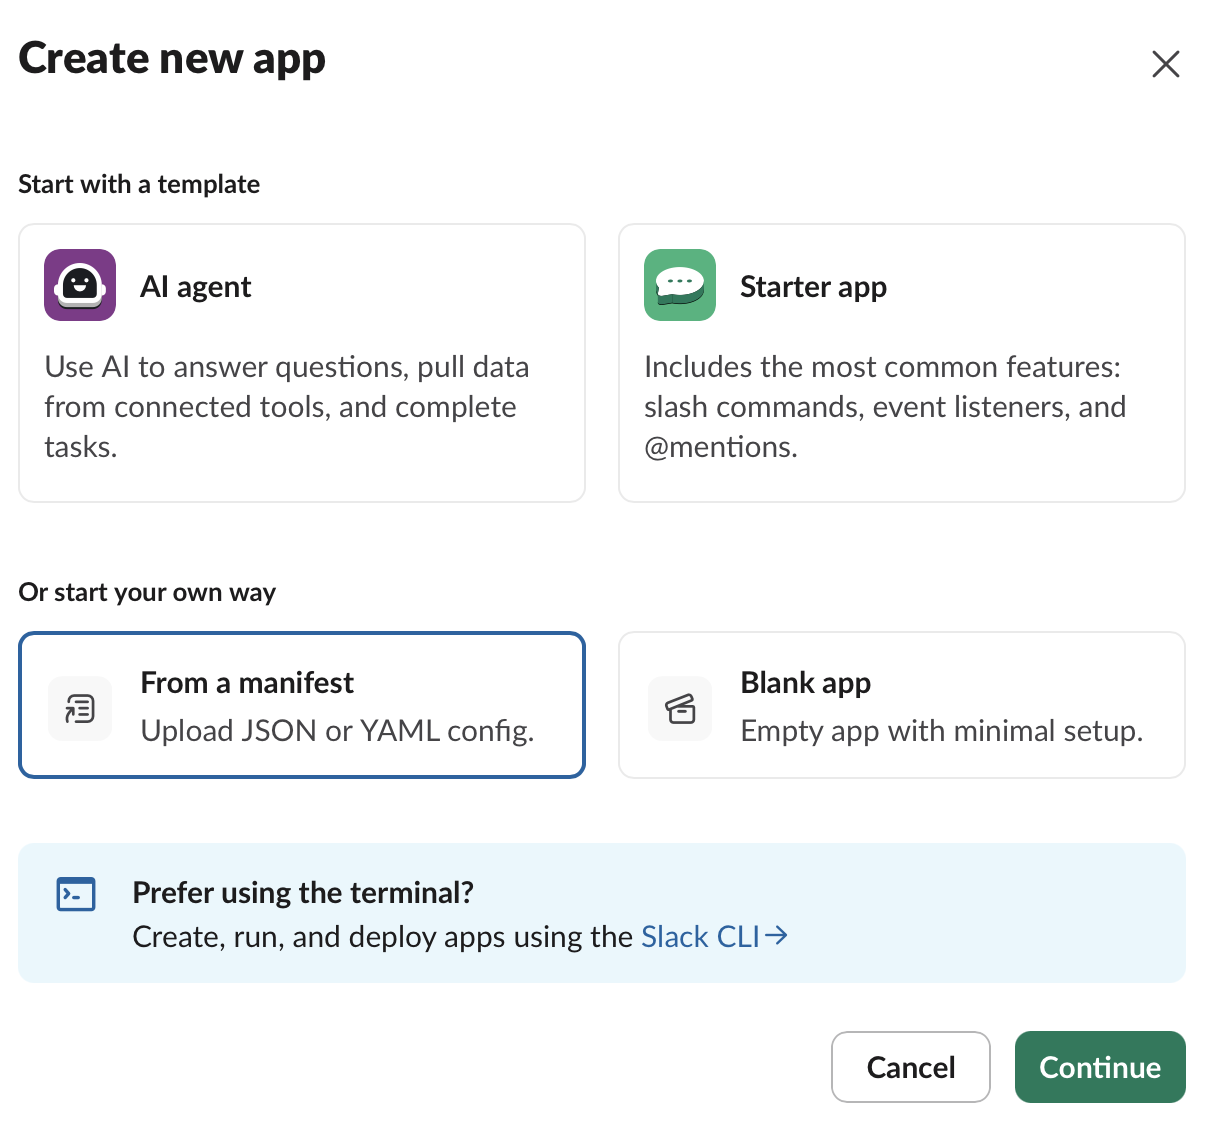
- Make sure the JSON tab is selected. Delete all the text in the box, select Copy on the block below, and paste it in its place.
{
  "display_information": {
    "name": "Invunion Notifications",
    "description": "Payment and invoice notifications from Invunion"
  },
  "features": {
    "bot_user": {
      "display_name": "Invunion Notifications",
      "always_online": false
    }
  },
  "oauth_config": {
    "scopes": {
      "bot": [
        "incoming-webhook"
      ]
    }
  },
  "settings": {
    "org_deploy_enabled": false,
    "socket_mode_enabled": false,
    "token_rotation_enabled": false
  }
}
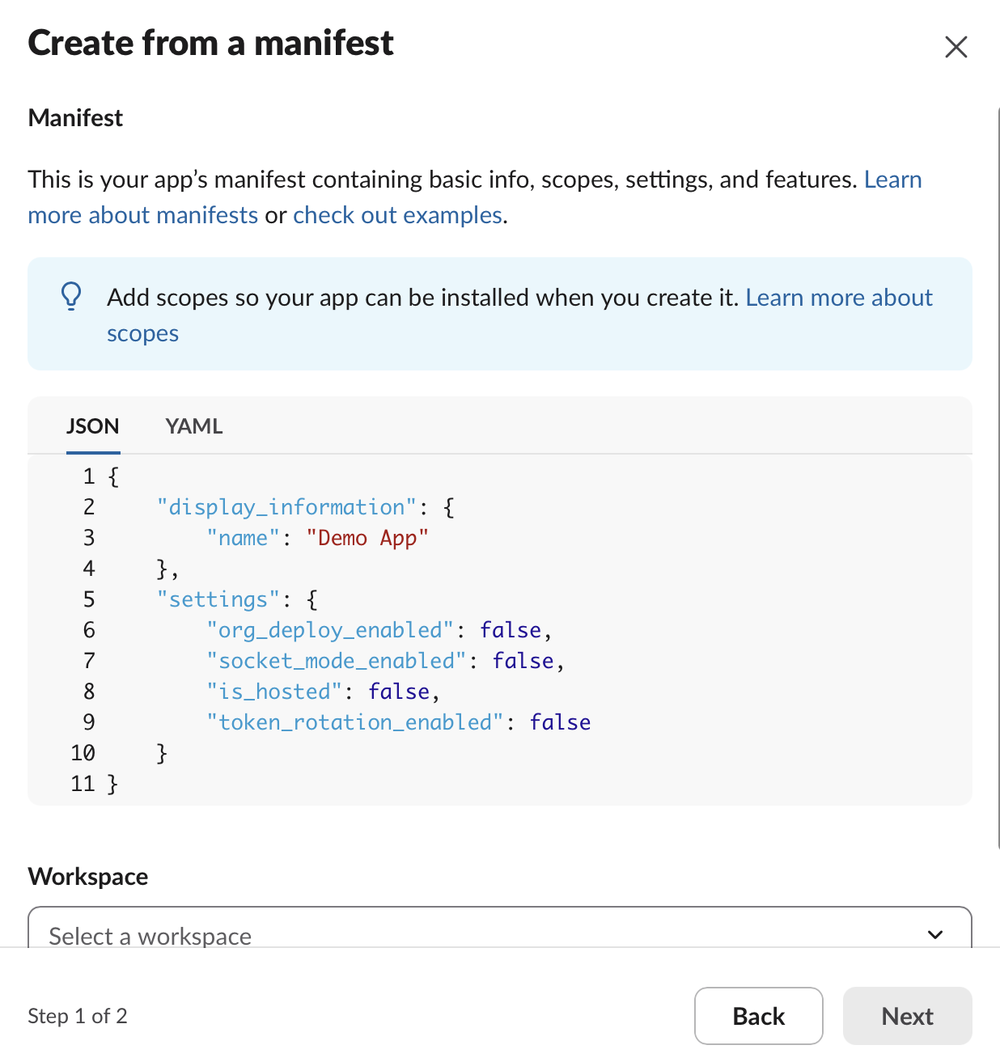
- Scroll down, choose your workspace, and select Next.
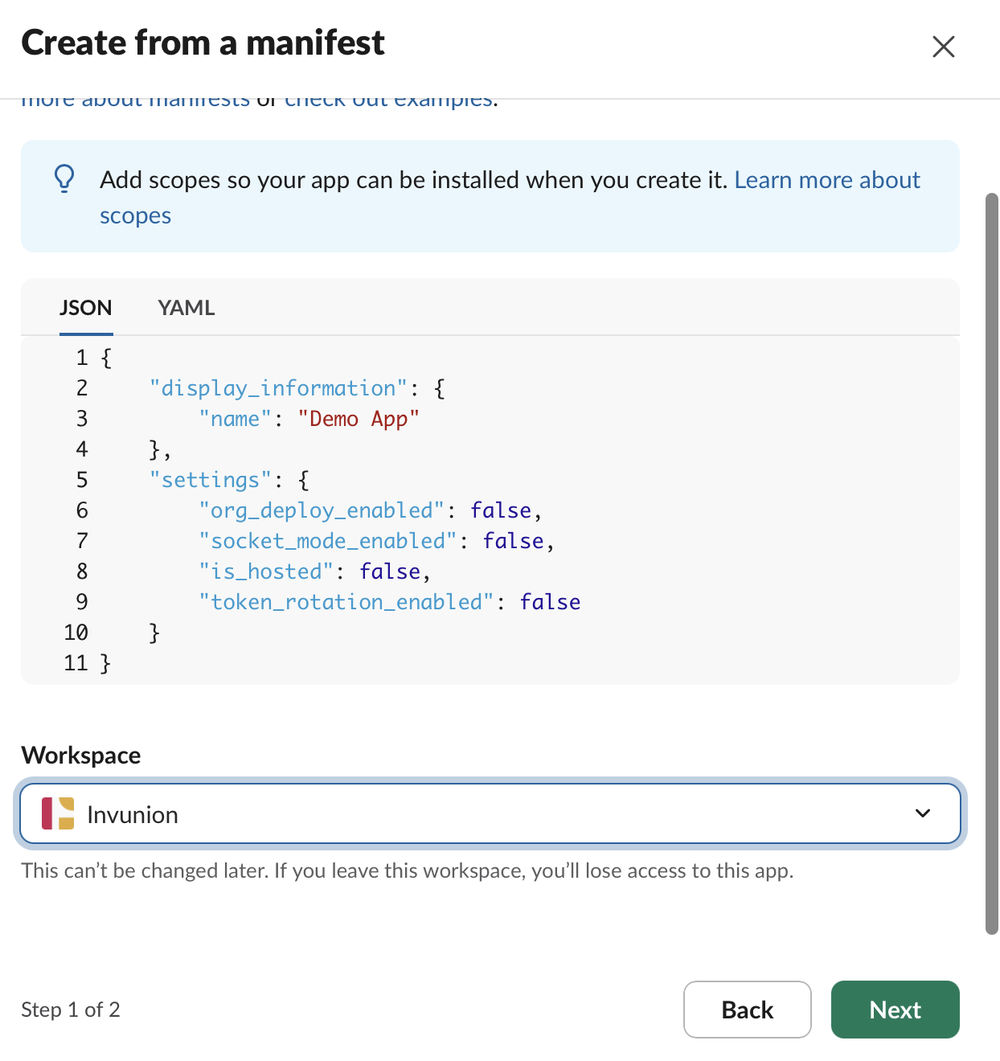
- Check the summary and select Create and Install.
- Under Channel for webhook, choose the channel that should receive the messages, for example
#finance, and select Allow.
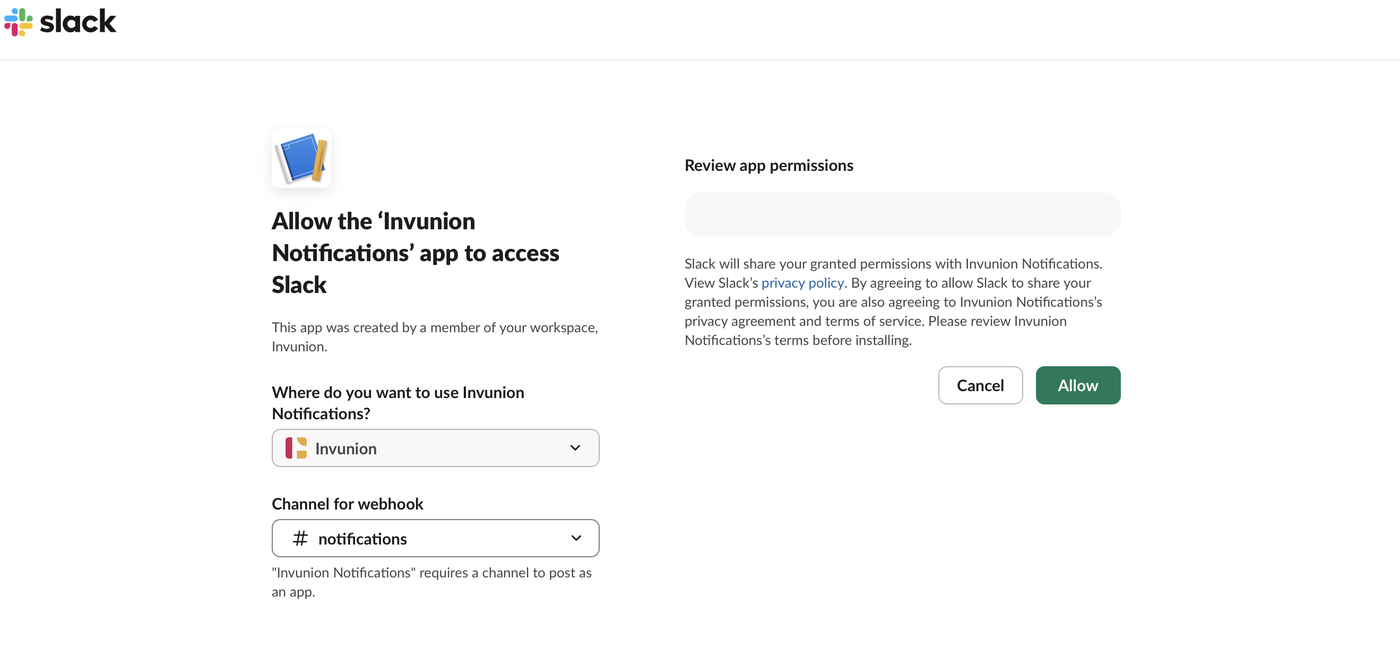
- In the left menu, select Incoming Webhooks. Select Copy next to the webhook URL.
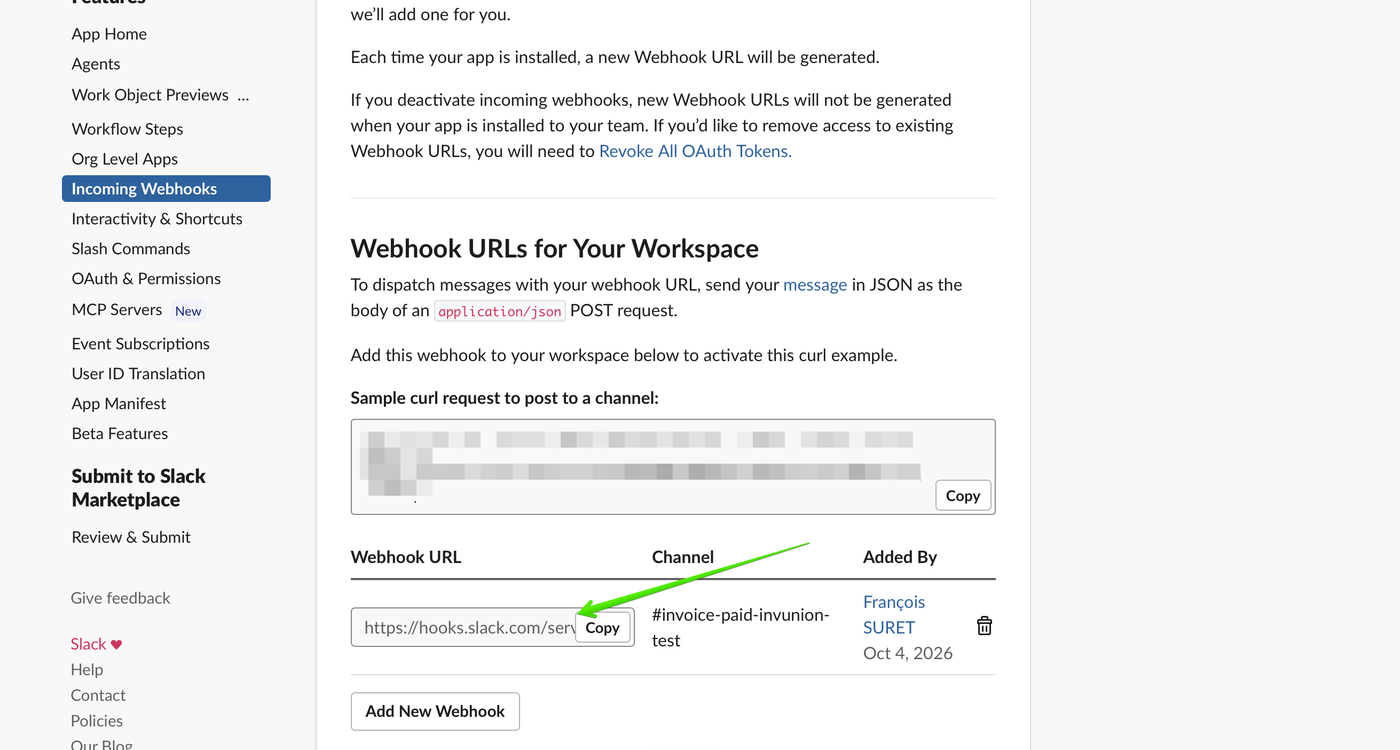
The app only has one permission: posting messages in the channel you chose. The URL starts with https://hooks.slack.com/services/. Treat it like a password: anyone who has it can post in that channel.
Part 2: add the channel to a notification rule
- In Invunion, open Settings > Administration > Notifications.
- Select Add notification, or edit an existing rule with the pencil icon.
- Choose the events, the timing and the filters of the rule.
- In Recipients, select Slack.
- Paste the URL in the Slack webhook URL field.
- Select Save.
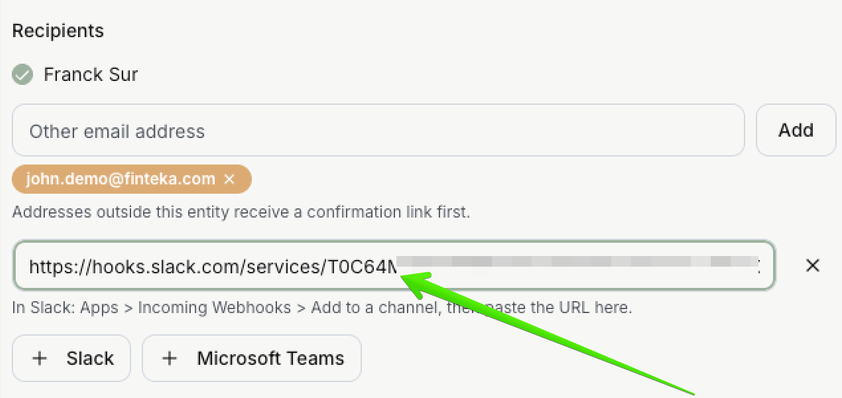
After saving, the rule card shows Slack with the last four characters of the URL. Invunion stores the URL encrypted and never shows it again. To replace it, edit the rule and paste a new one.
Part 3: check that it works
Select the Send test icon on the rule card. A test message arrives in the Slack channel within a few seconds.
If nothing arrives, open the rule’s History. Each message shows its status: pending, sent, failed, or skipped.
If it does not work
| What you see | Why | What to do |
|---|---|---|
| Invunion refuses the URL when you save | Invunion only accepts Slack webhook addresses, which start with https://hooks.slack.com/. | Copy the URL again from the Incoming Webhooks page. |
| The test is marked failed | Slack could not be reached. Invunion retries 5 times, after 1, 4, 16 and 64 minutes. | Wait for the retries, then check History again. |
| The Slack part of the rule stops sending | If Slack answers that the webhook is forbidden, not found or gone, Invunion disables it. This happens when the app or the webhook was deleted. | Create a new webhook in Part 1, edit the rule and paste the new URL. |
| The message goes to the wrong channel | A webhook is tied to the channel you chose in step 6. | Create a new webhook for the right channel and replace the URL. |
Good to know
- One rule can post to several channels. Select Slack again to add another URL.
- The message wording is the same as for email and Teams. You can change it in Customize the message.
- To remove the connection, delete the Slack line from the rule, or delete the app in Slack.
Updated · View as Markdown